
The Employees’ Provident Fund Organization (EPFO) is encouraging PF account holders to nominate their relatives for social security benefits. If you haven’t completed this process yet, we urge you to do so promptly. By nominating your family members, they will have the ability to withdraw your funds in the event of your absence.
Despite all efforts, observers have noted that numerous PF account holders have yet to designate a nominee. In such instances, you have the option to visit the EPFO Member Home page and independently follow the steps outlined below to add your nominee, all from the convenience of your home.
Visit On EPFO Portal Button
Instructions For Incorporating E-Nomination Into Your EPFO Account
To include EPFO e-nomination, please add here to the following steps:
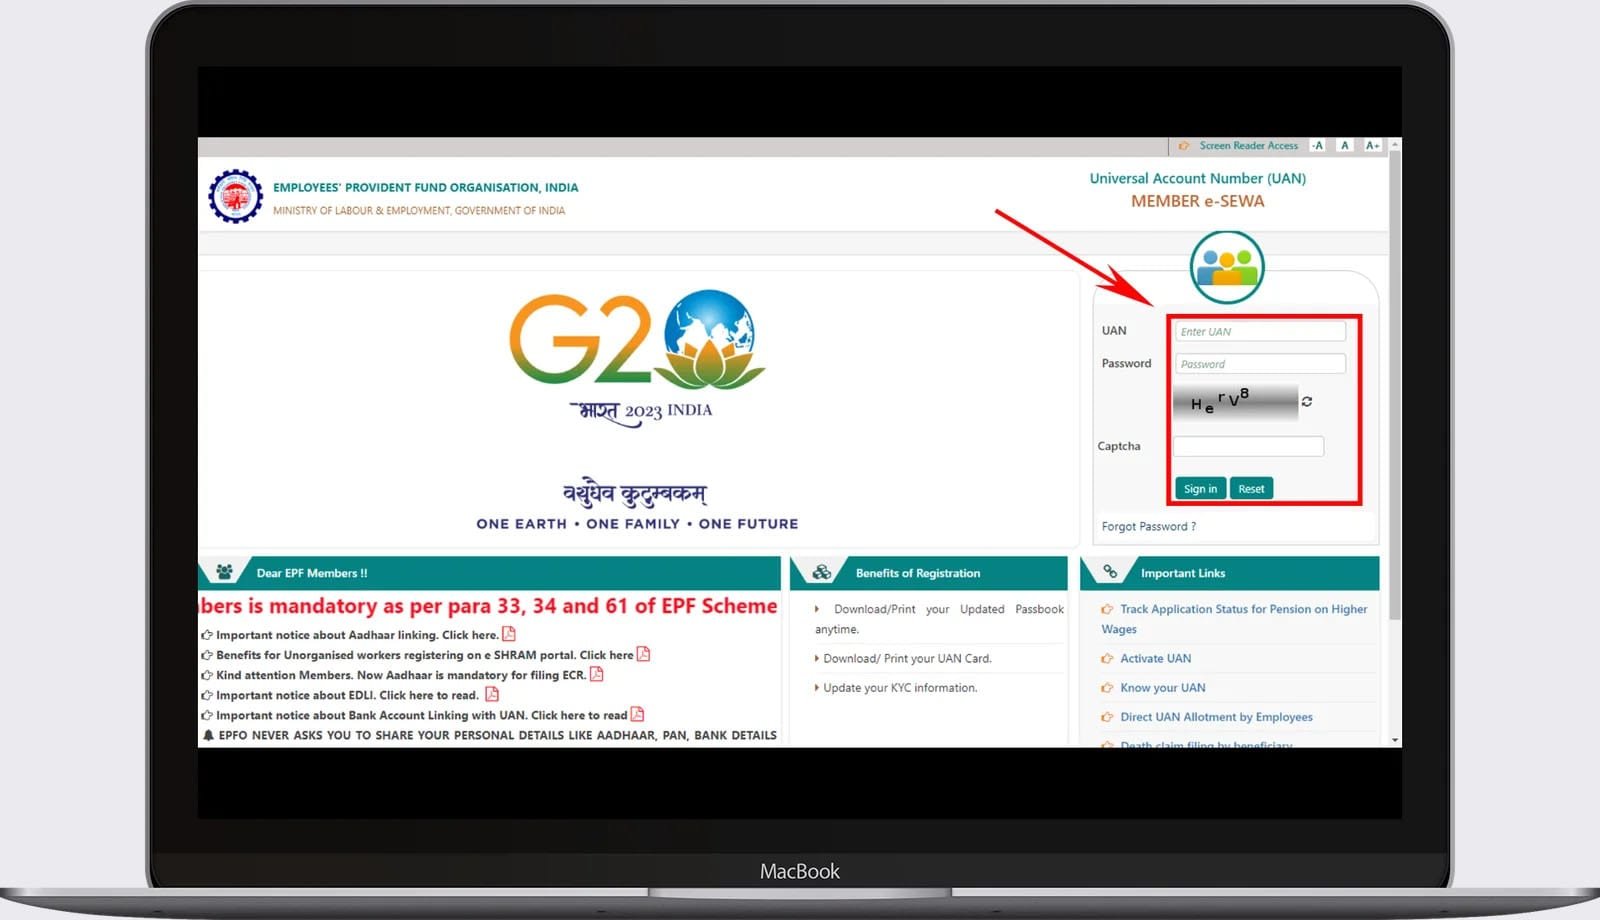
- Firstly, it is necessary to access the EPFO’s official website at https://www.epfindia.gov.in
- Afterward, navigate to the “Online Services” section found on the homepage. Proceed to log in or sign in using your UAN number and password.
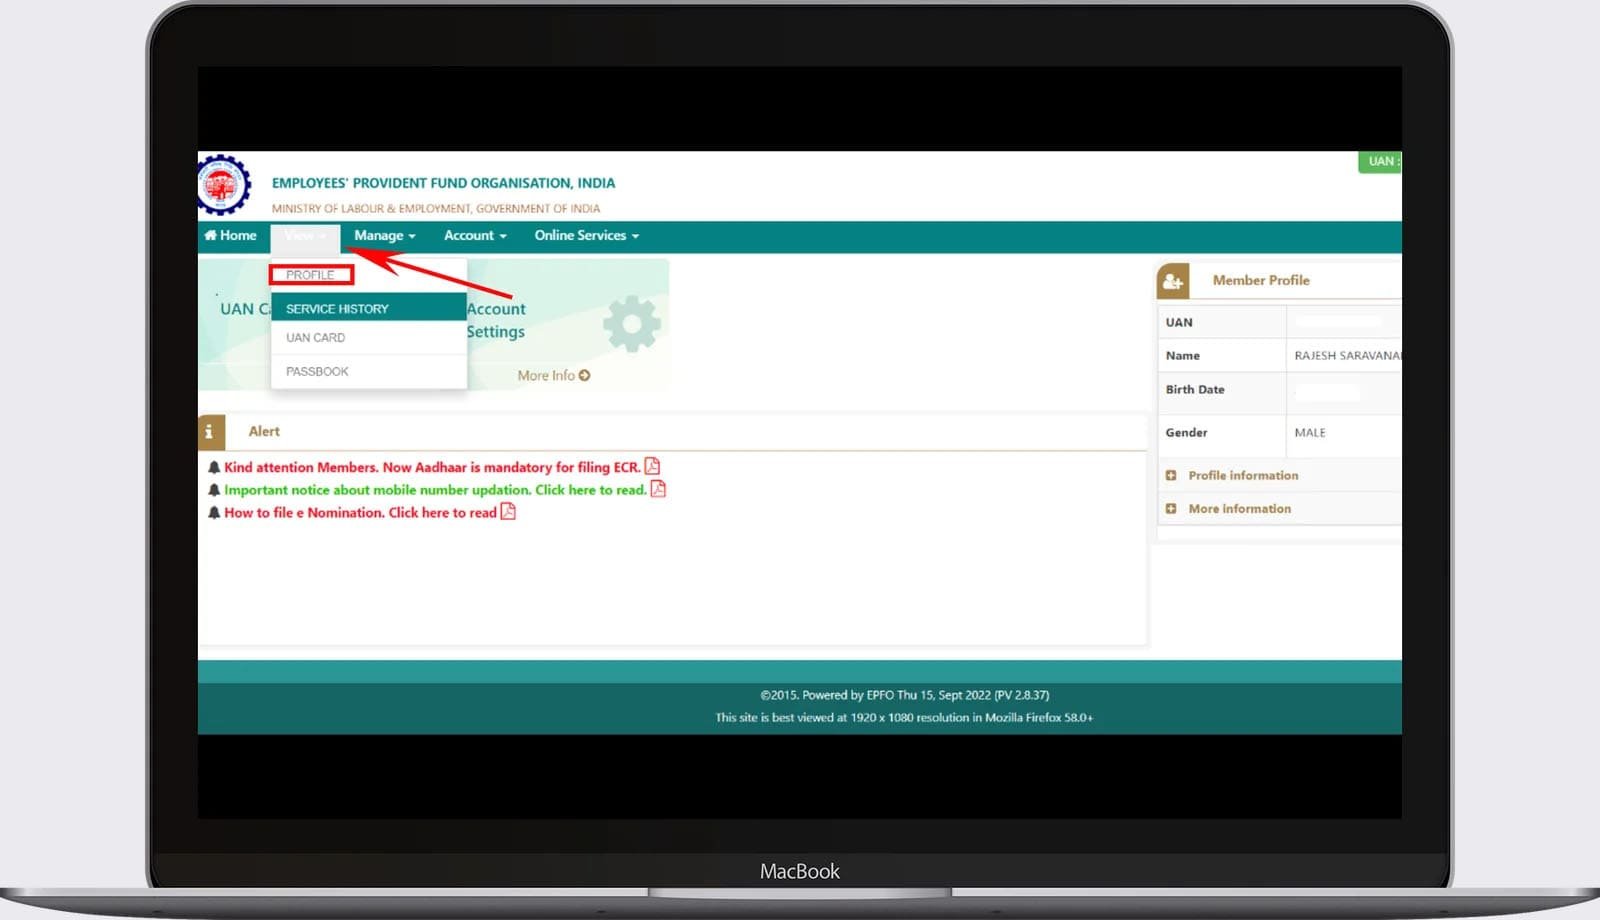
- After completing the previous step, a new page will open. Navigate to the menu bar and select “View.” Subsequently, a drop-down menu will appear with various options, among which you should choose the “Profile” option.
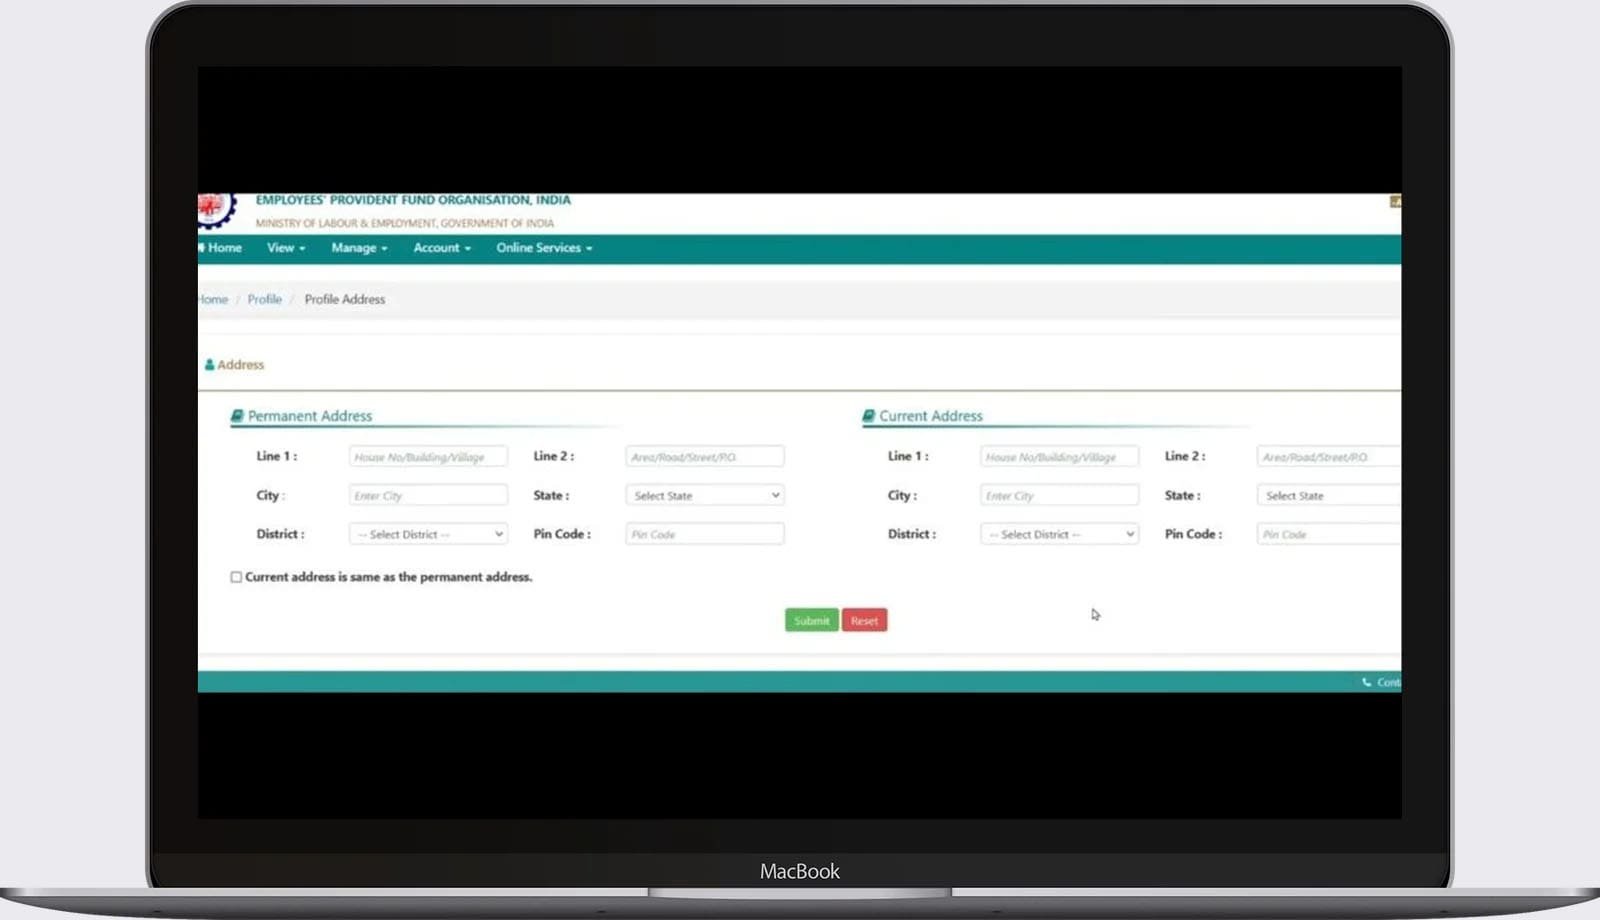
- After completing this process, the system will display all your information, allowing you to review your details and address initially. It’s crucial to ensure that you include your photo; if you don’t, you can choose to upload it.
- Afterward, as you examine additional details, it will be necessary for you to revise your marital status.
- Next, ensure that your permanent address, which refers to your entire address, is updated. Afterward, click on the “Submit” button to finalize your profile details.
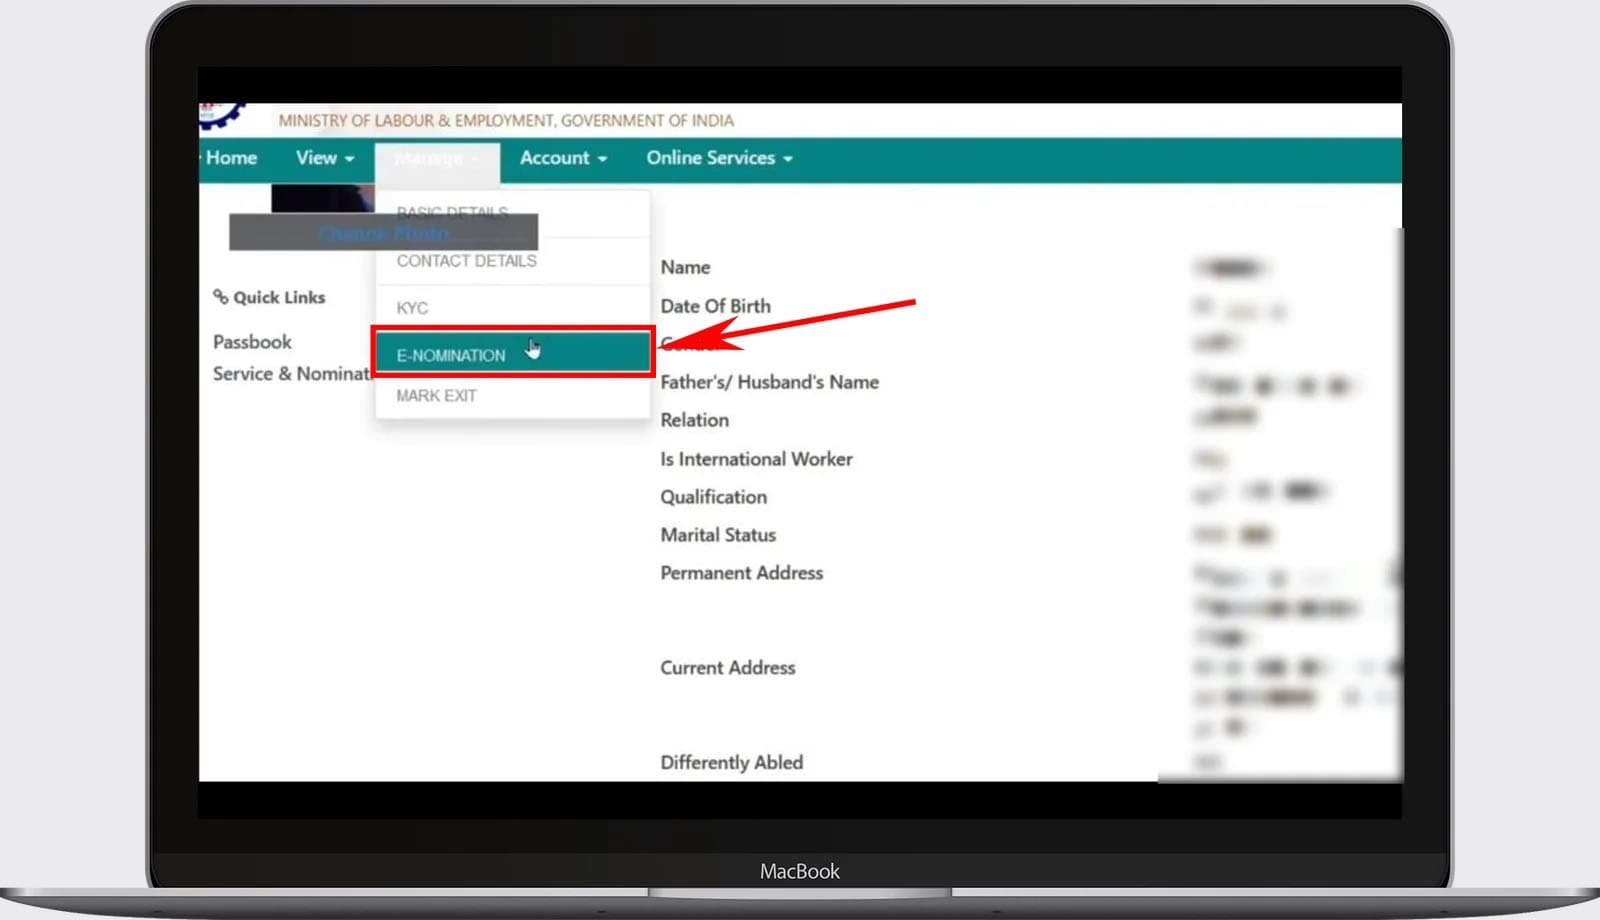
- Following that, you should select “Manage” from the top menu. Once clicked, a drop-down menu will appear, where you need to choose the option labeled ” E-Nomination. “
- Upon clicking, you’ll be directed to the profile page, where you’ll need to select the “Proceed” button situated below it.
- Following this, you will encounter a family declaration page where you must indicate your family status by selecting either “Yes” or “No” in the “Having Family” section located at the top.

- Following that, a page will appear, and you are required to input the nominee’s details by the information on the Aadhaar card. Failure to provide information in alignment with the Aadhaar card may result in an error page.
- Hence, it is advisable to input the details precisely as they are reflected on the Aadhaar card.
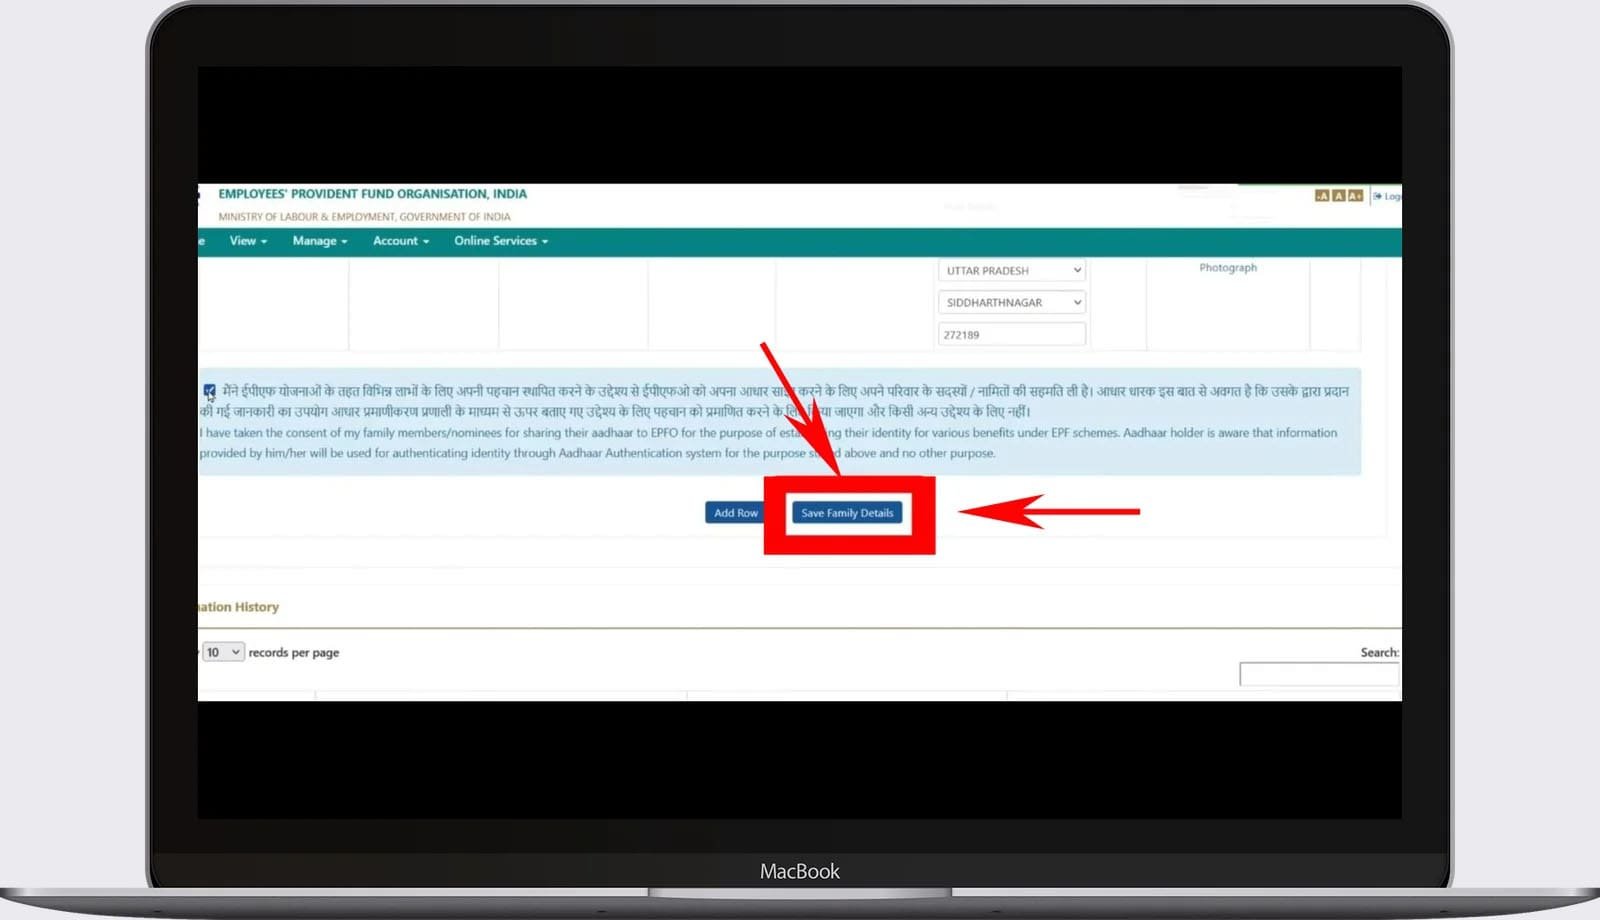
- Hence, when submitting details for the nominee on the designated page, be sure to furnish the nominee’s Aadhaar card number, name, date of birth, and your connection with the nominee, along with their full address, and also upload a photograph.
- Following this step, click on “Save Family Details” after checking the box below. To include an additional nominee, you can choose “Add Row” using the button below.
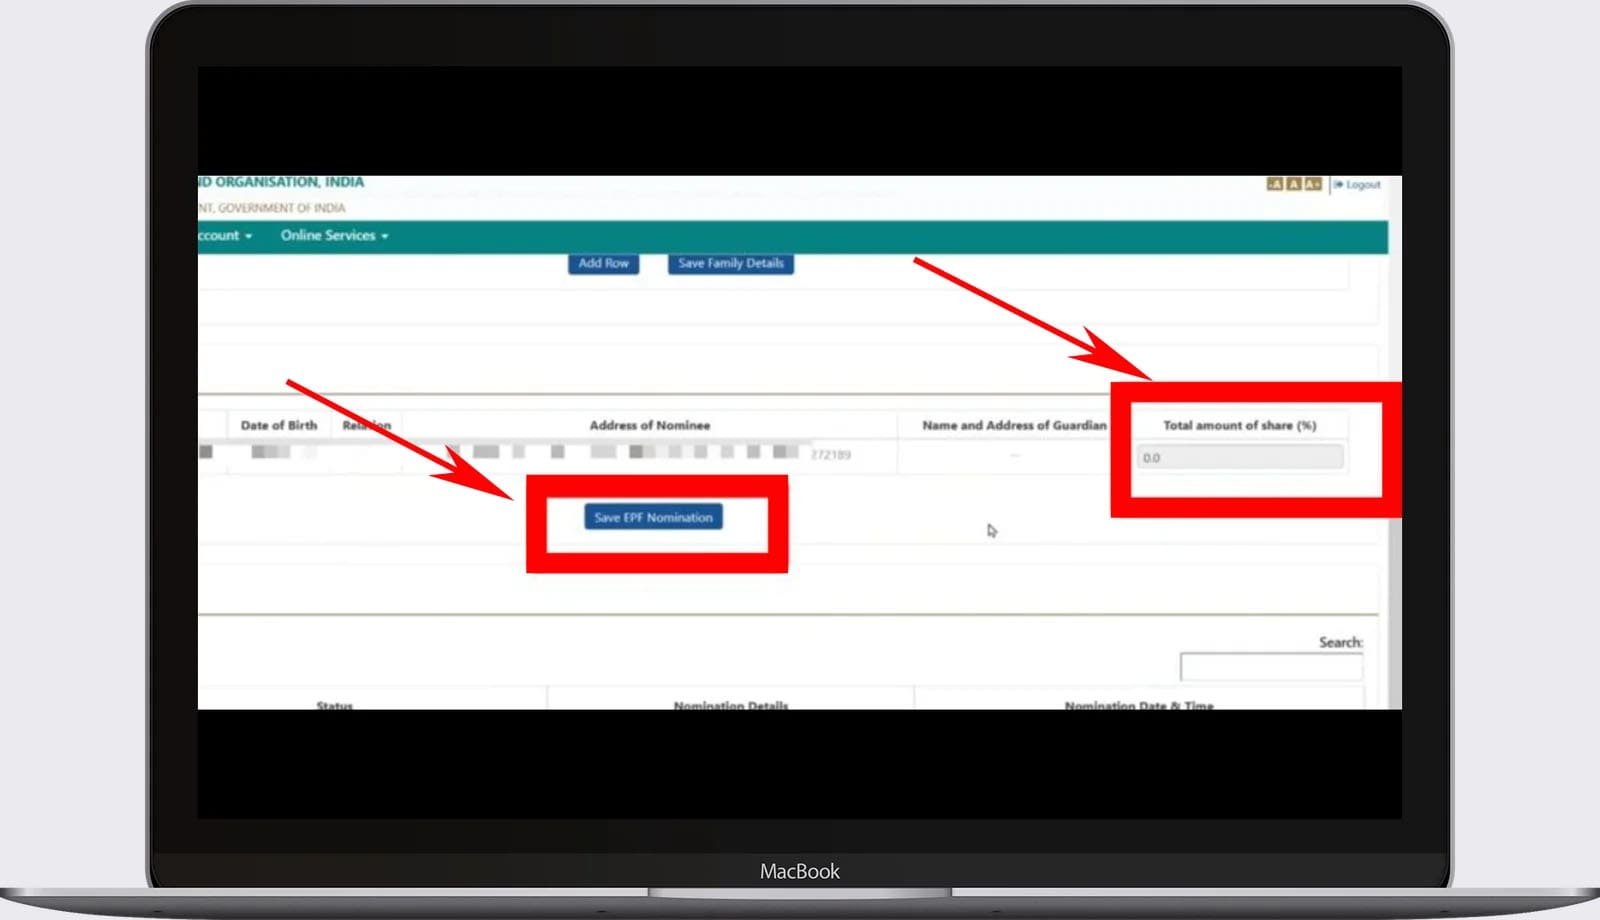
- Following that, the nominee’s details will be stored. Upon scrolling down, you’ll come across a section labeled “EPF Nomination.” Within this section, you’ll find comprehensive information about the nominee. Ensure to mark the checkbox labeled “Select” situated below.
- Afterward, in the section labeled “Total Share Amount,” please input the value 100. If you have chosen multiple nominees, you can distribute the total amount among them as needed. Following this step, click on the “Save EPF Nomination” button located at the bottom.
- After completing these steps, the system will successfully save your EPF details. Subsequently, you will observe “Pending Nomination” displayed before you. To view it, click on “View,” or choose to remove it by clicking on “Delete.” Within this process, you will need to select the “E Sign” option. Should an error occur upon clicking, there is no cause for concern. EPFO errors are not uncommon, and you can attempt the process again after some time.
- After completing this step, EPFO’s e-signature page will appear. Here, please ensure to verify the checkbox positioned underneath.

- After completing this action, your page will immediately take you to the Aadhaar authentication page.
- After completing this step, you must enter the Aadhaar card number of the PF member, and then click on the “GET OTP” button located below.
- Afterward, our system will send a One-Time Password (OTP) to the mobile number you have registered. Please input this OTP in the designated box. Following that, check the box below and proceed by clicking the “Submit” button.
- After completing this action, a page will display numerous visible dots. Click on the dot at the topmost position.
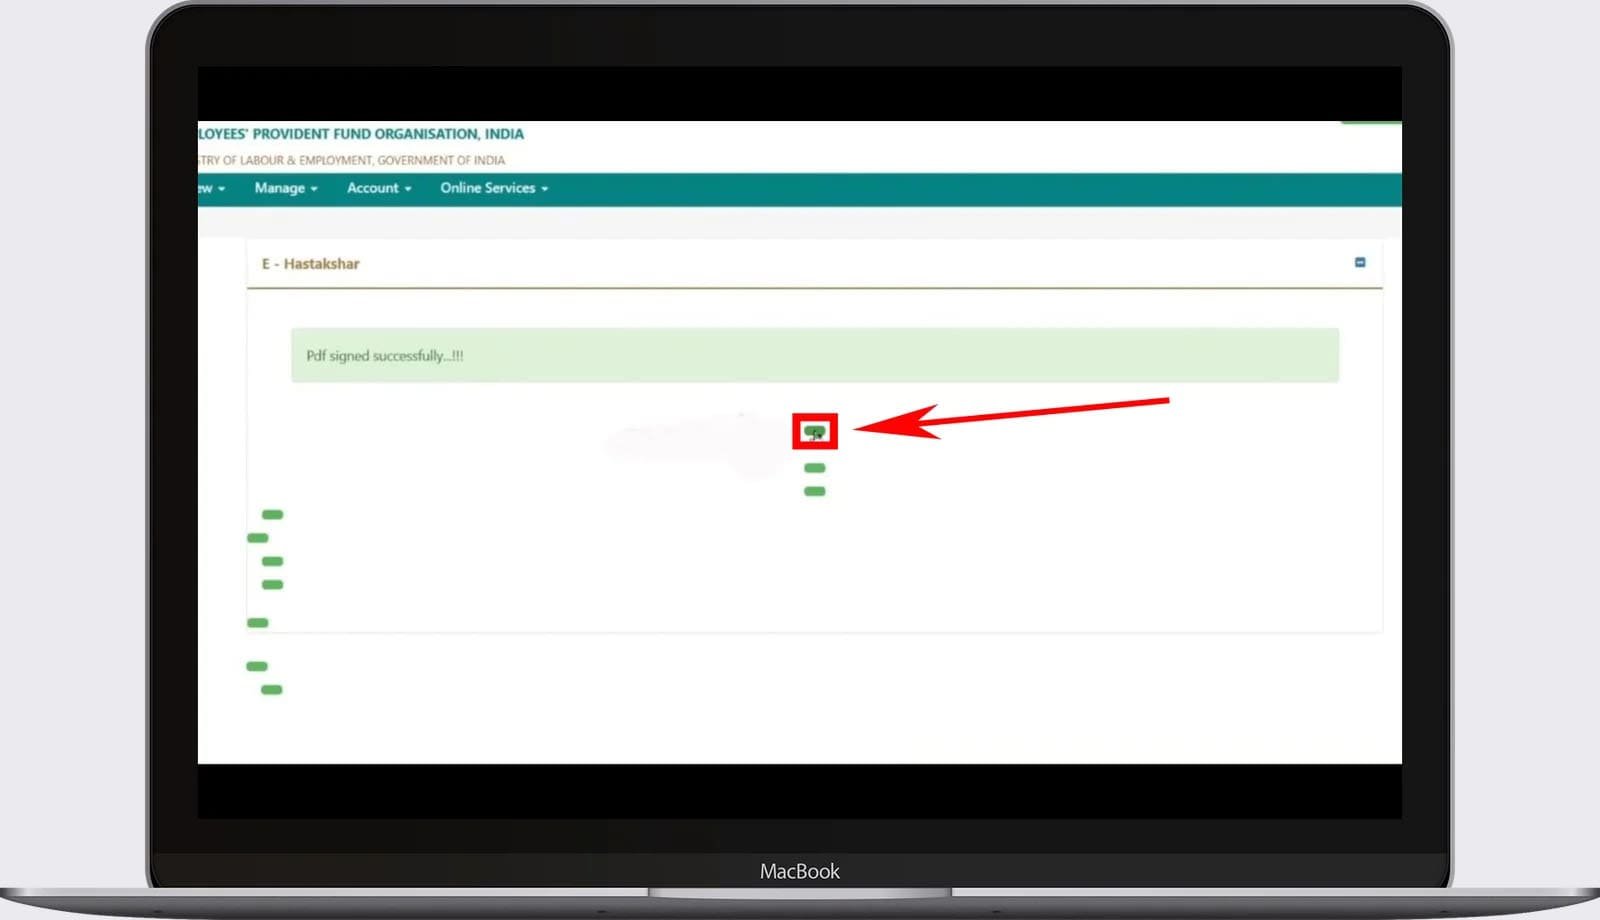
After completing this step, you’ll encounter the “Nomination Successful” option, which you can then preview. If desired, you can generate a document sign under the “Nomination Details” section. To do so, simply click on it, and upon completion, you’ll have access to all the information in PDF format.