The Employee Provident Fund Organization (EPFO) has been a pivotal government entity in India overseeing employee provident funds, insurance, and pensions since 1952. Administered by the Ministry of Labour and Employment, it is distinguished for its extensive membership and financial transactions.
Today, our attention will be directed towards the process of updating the ‘Date of Exit’ and providing the reason for leaving the EPF account for members who have concluded their employment. This is a crucial step in effectively managing their EPF details.
EPFO Member Portal Button
Updating the Exit Date in Your EPF Account: A Step-by-Step Guide
To modify the Date of Exit in your EPF account, you can proceed by taking the subsequent steps:
- First, it is essential to go to the official EPFO website, accessible at https://www.epfindia.gov.in.
- Next, navigate to the “Services section” found on the main page, and select “For Employee.”
- Afterward, input your UAN (Universal Account Number) and password, then proceed by clicking the Sign-In button.
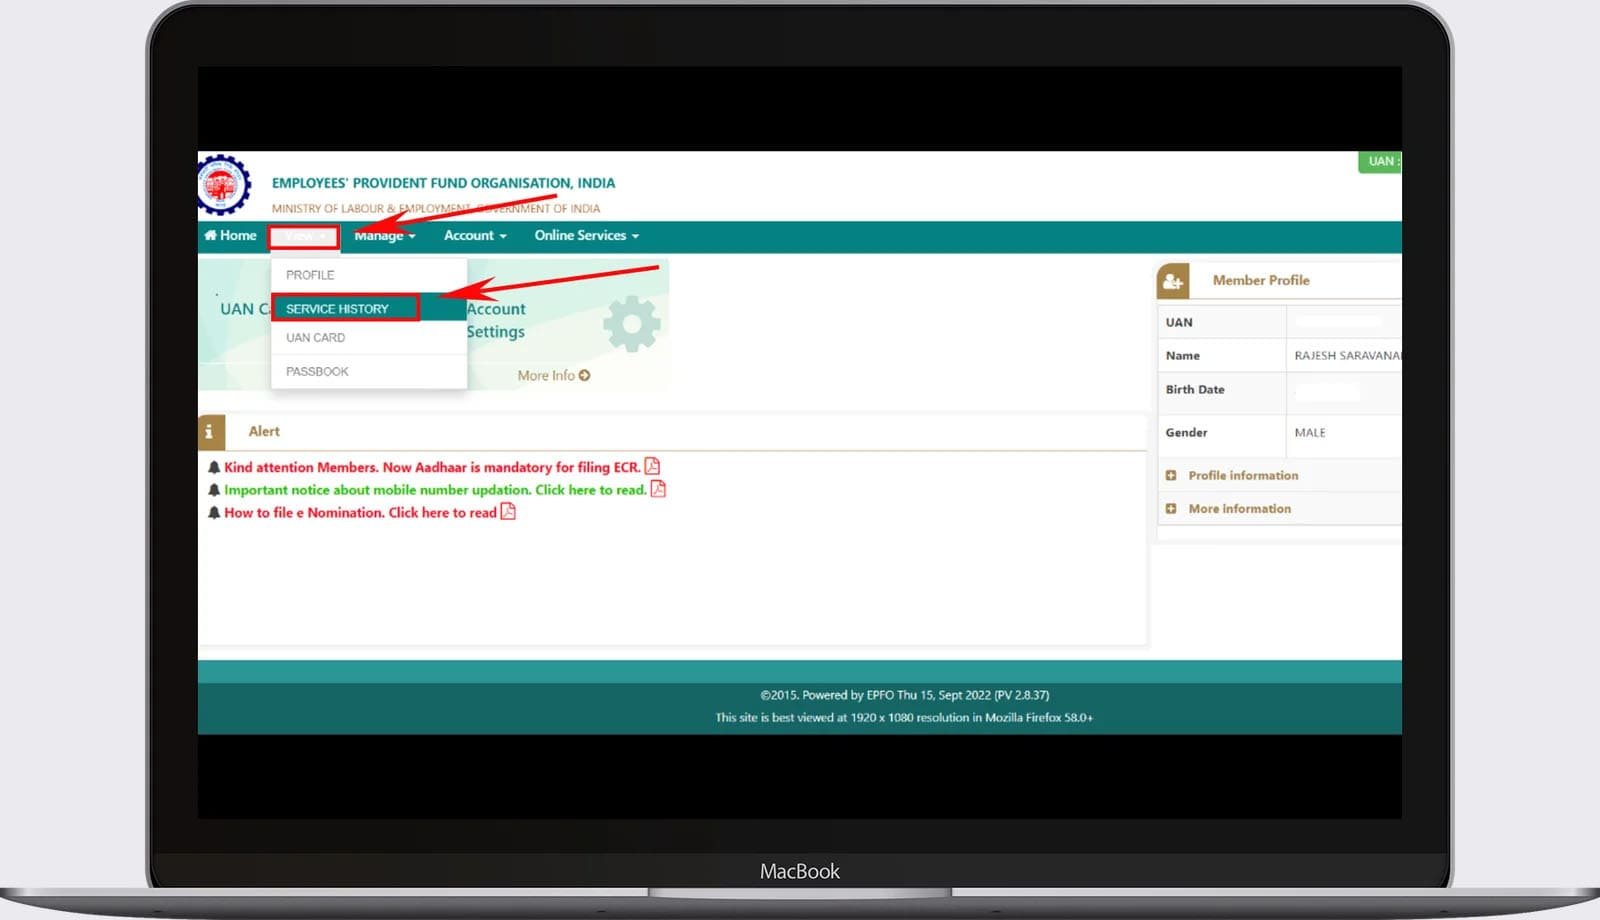
- Following that, a new page will appear. On this page, navigate to the top menu bar and select the View button.
- Next, you’ll encounter various choices in a dropdown menu; among these options, select “Service History.”

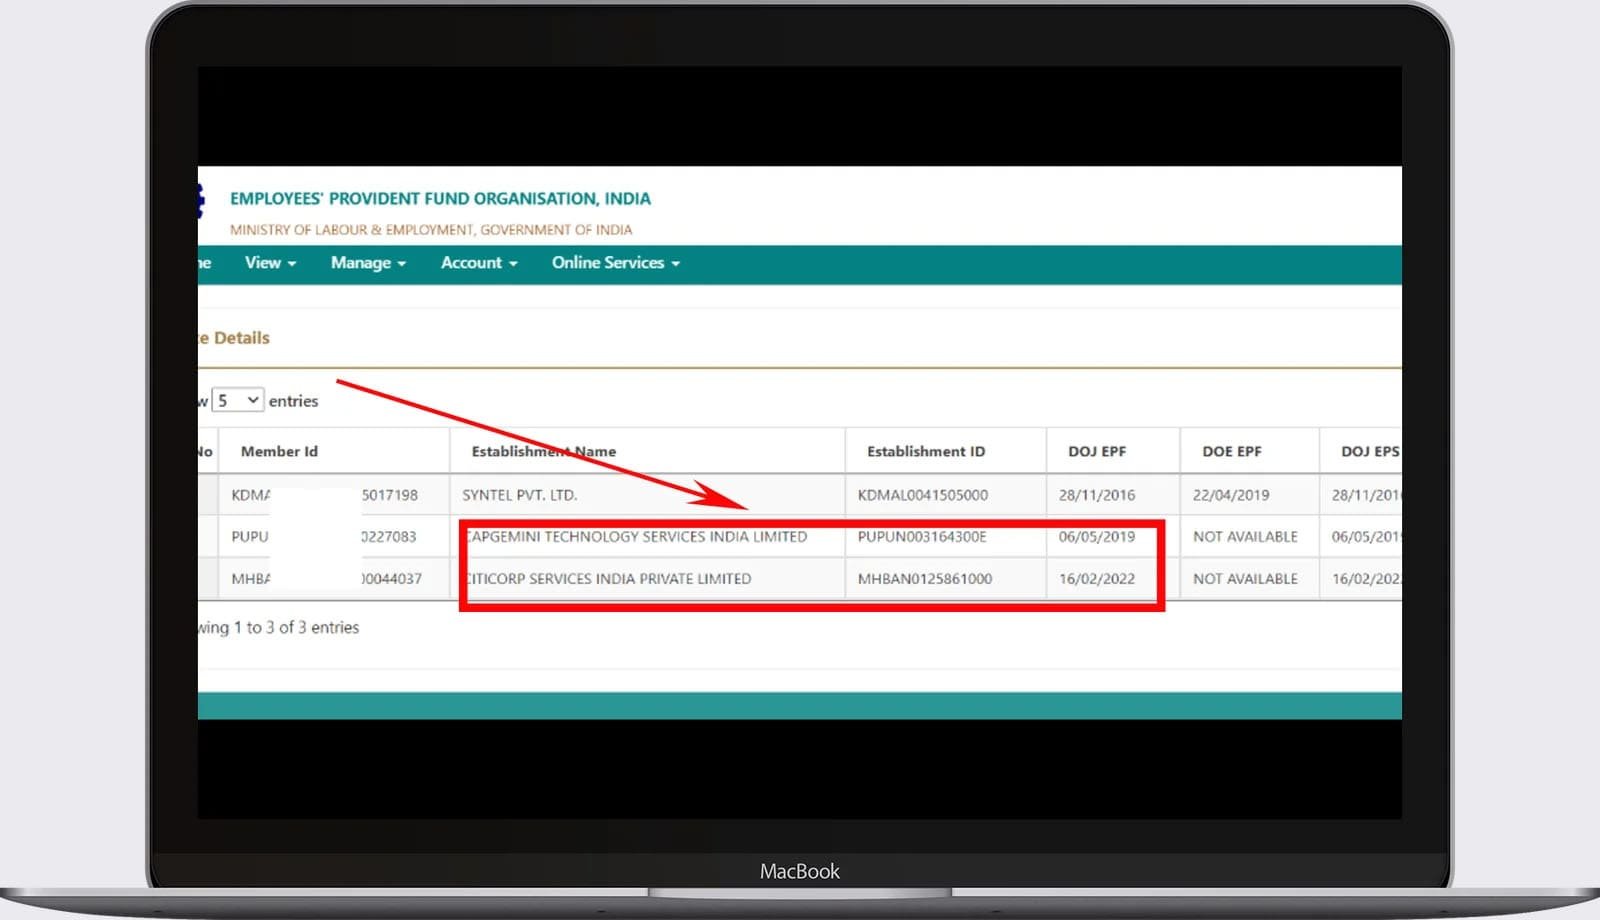
- While engaging in this process, a page will appear before you, displaying comprehensive details about your professional history, including the number of companies you’ve been employed by.
- If the information for all the companies you’ve been associated with is displaying accurately, that’s excellent. Nevertheless, should the “DOE EPS” field indicate “Not Available,” feel free to make the necessary updates.
- To perform the update, please select the “Manage” option from the top menu bar.
- Afterward, a variety of choices will be presented. Select “Mark Exit” from among these options.
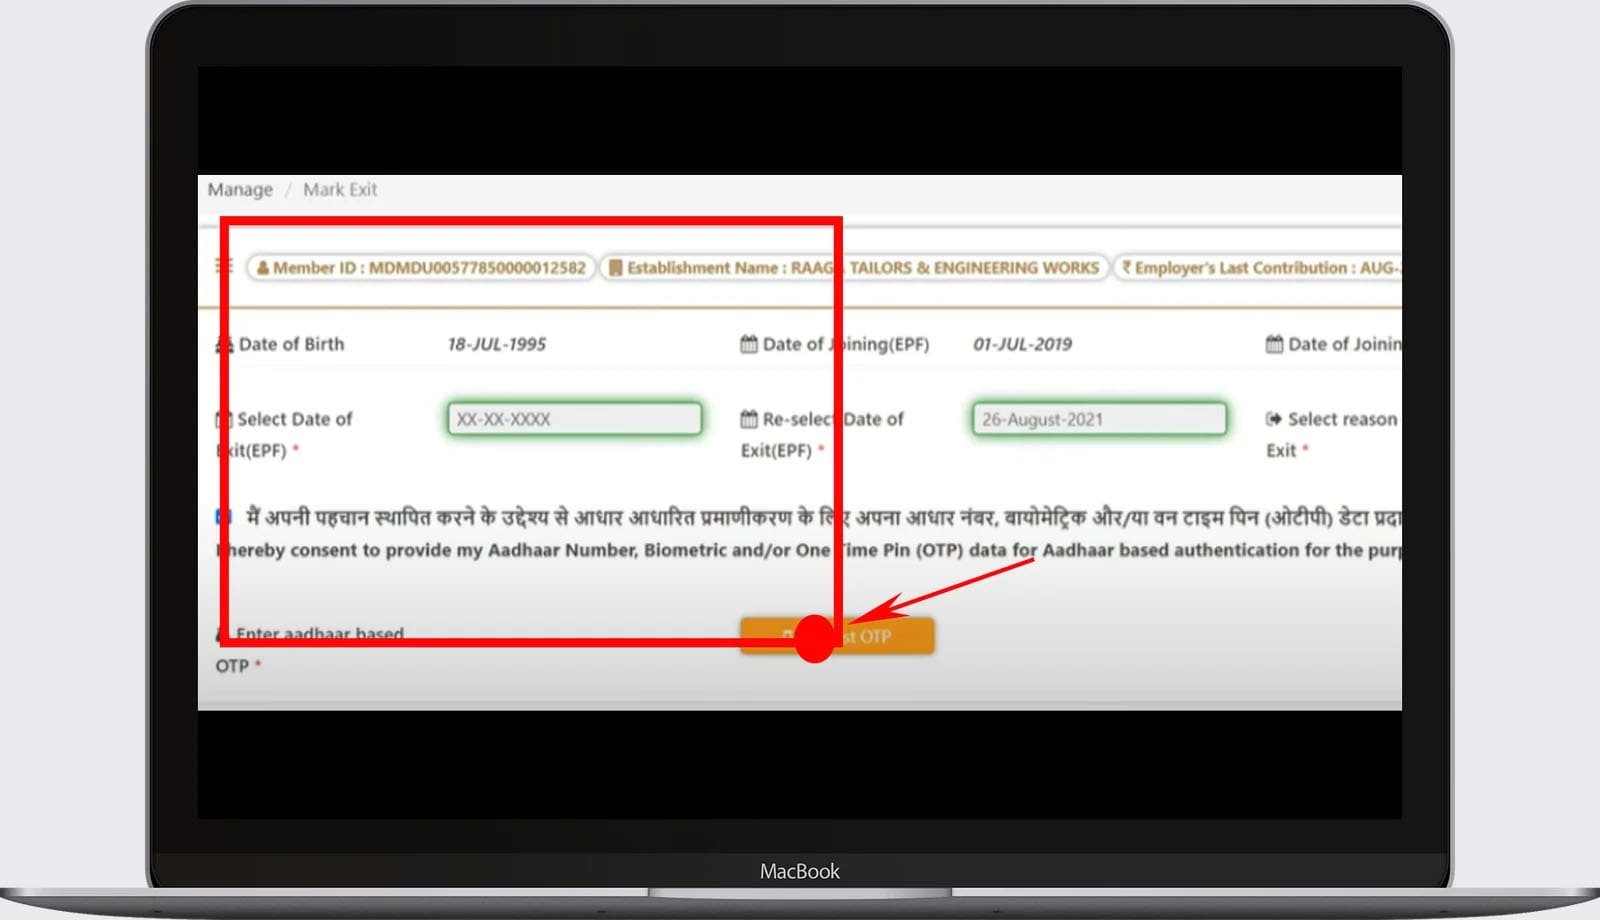
- Next, a page will appear on your screen, and you should click on the option labeled “Select Employment” to designate your company.
- Following that, a form will be presented, prompting you to input the “Date of Departure” and unselect the “Deselect Date of Exit” option. Furthermore, there is additional information available for your thorough review.
- Next, check the checkbox below and click on “Request OTP.”
- After completing this action, a notification will display on your screen, prompting you to select the “Yes” button.
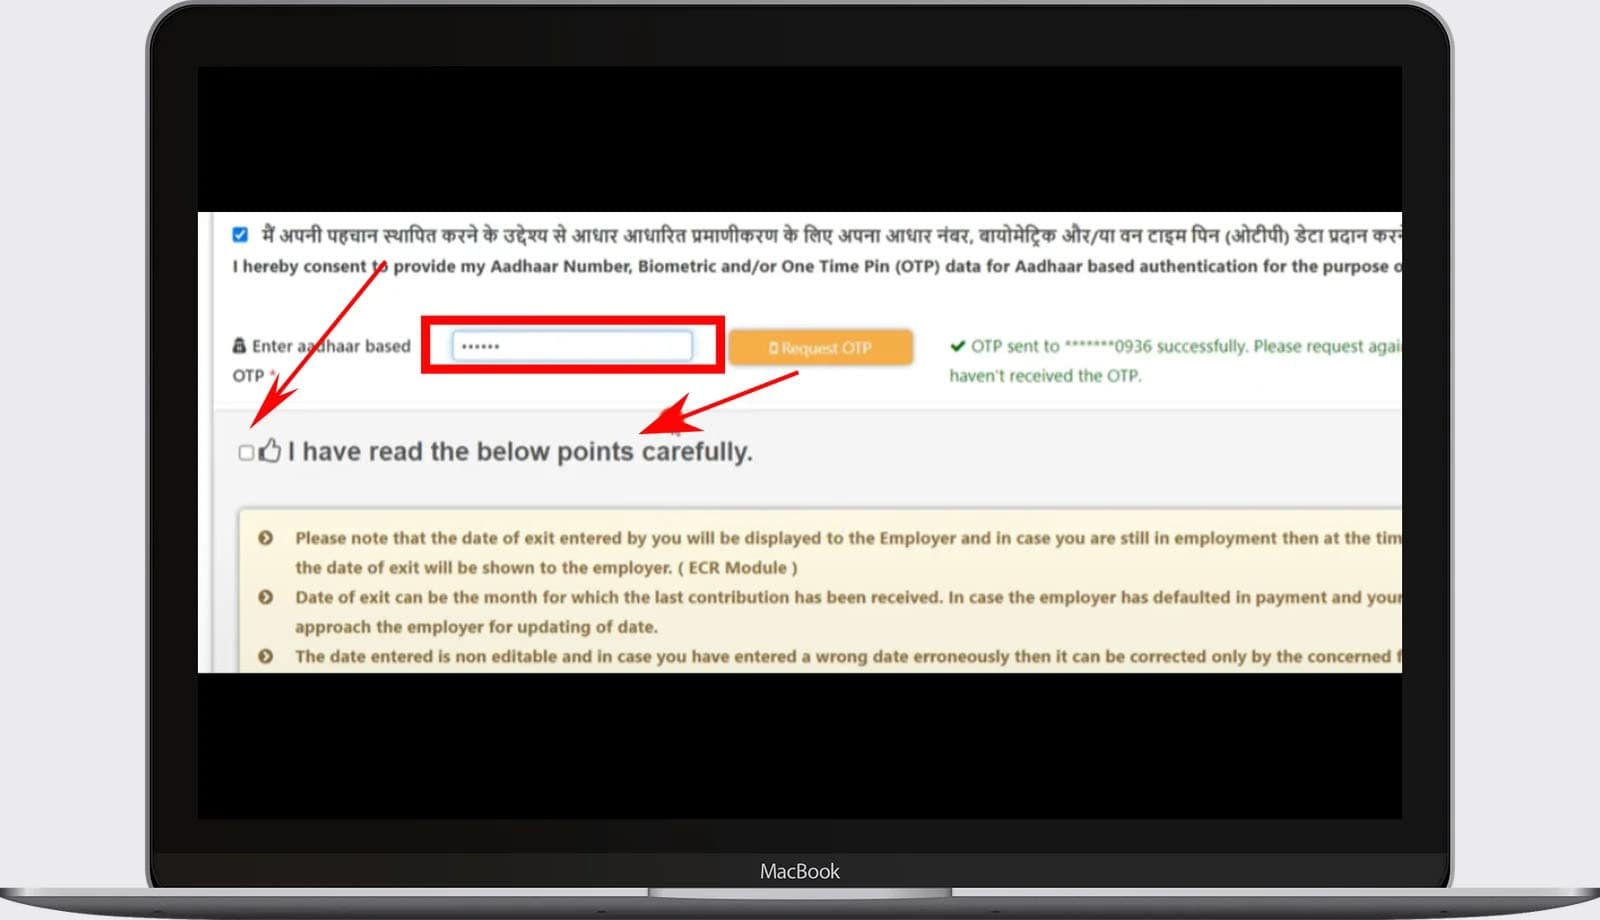
- After completing the action, an OTP will be sent to your designated mobile number. Next, input the OTP, mark the checkbox provided, and proceed by clicking the “Submit” button.
- Upon selecting, a notification popup will once again be displayed on your screen. Proceed by clicking “Update” within that popup.
- Following a period, an alert stating “Update Successful” will be sent to you. Subsequently, you should proceed by clicking the “OK” button.
After doing this, a page will appear in front of you mentioning that your information has been updated. After this, if you wish, you can withdraw your money immediately, but it is recommended to perform this action one day later.